Table of Contents
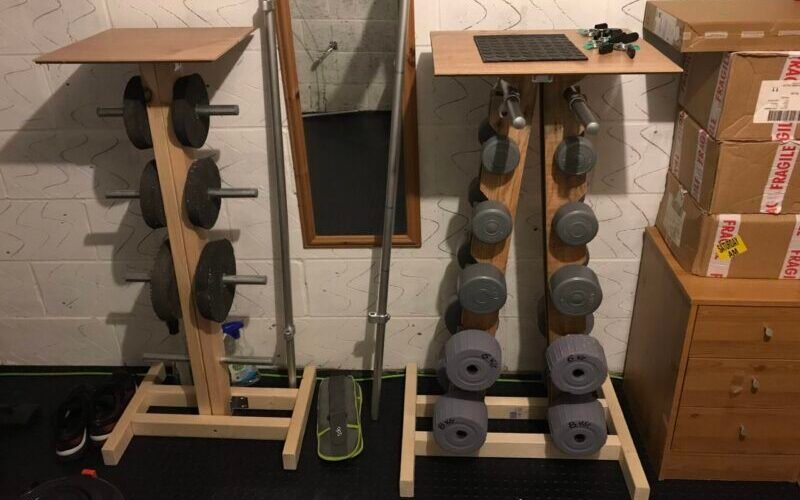
ToggleYou have all your weights ready and they are taking a lot of space? Here is a solution, create your own weights rack custom to you and that will save you some space.
Here’s a step-by-step guide on how to make your own weights rack.
Materials Needed
Working with the measures I needed, you might have to adjust.
- Wood 45x95mm or 50x100mm: 1 board of 2400mm.
- Wood 38x63mm: 1 board of 2400mm.
- Wood Screws
- Wood Glue
- Galvanized Tube: Cut to size. Diameter 26.9mm:
- 1 of 350mm (You might need to change based on your needs).
- 3 of 400mm (You might need to change based on your needs).
- Q Clamp Plastic Stop End (8): To protect the end of the tube.
- Some wood for the top (Optional, I just created this to add a small table for Laptop/Tablet/Phone while exercising)
Tools Needed
- Drill
- Square (Make sure things are square or else it might break with the weight)
- Tape Measure
- Saw (Circular or other)
- Sander (Or just sandpaper)
- Clamps
- Wood stain or paint (optional)
- Paintbrush or roller
Step-by-Step Instructions
1. Cut the Wood
50x100mm into 2 of 1200mm
38x63mm into 2 of 400mm and 2 of 500mm
2. Structure
Glue and screw the 2 50x100mm together.
Measure the space needed for your weights and mark where you want the horizontal bars. Make sure you take into consideration all the space needed, including the wood for the base.
Drill the holes for the bars.
Insert the tubes and put the plastic stop ends.
3. Make the base
Put the 2 500mm at the bottom parallel to the tubes, glue and screw them to the structure.
Add the 2 400mm perpendicular to the previous ones on each side and glue and screw them as well.
You can add some metal plates to reinforce the structure.
4. Optional Top
Attach a top to the structure so you can use it as a table when you exercise, this can be used for a laptop or even a phone while you watch something.
Finishing Touches
Make sure all is well square and balanced, sand everything until smooth (You can start with 40/80 grit and then go up to 120/220/320, depending on how smooth you want it), add the weights to test.
You can apply a finish or paint the rack and make it part of your home gym.
Tips and Tricks
Make sure you measure everything well and plan it so you don’t get any surprises.
Hope this will help you to start your own rack for all the weights you built or the ones you had already around. If you have any questions or want to share your DIY ideas, send me a message and if I get a lot of requests, will add a video explaining the whole process.